FAQs and Helpful Hints
-
How do I load the PC-ACE program?
If you are downloading from the Internet, please follow the steps outlined in the ASK Confirmation Letter.
If you were mailed a CD, manually start the CD by double-clicking on the My Computer icon from the desktop. Double click on the CD-ROM drive and double click on the setup.exe icon.
Follow the on-screen wizard steps to complete the installation. When prompted to select a destination drive, it is recommended to select a drive local to your machine (i.e.: the “C” drive). The PC-ACE files will be installed to the WINPCACE directory on the selected drive. Desktop icons will be created for PC-ACE and a README file.
-
Where can I find the Installation Password?
The installation password is found in your ASK Confirmation Letter.
-
How do I install PC-ACE on a network?
If a multi-user operation is required, the client installation procedure will need to be performed from each workstation wishing PC-ACE access.
- First, confirm the workstation has access to the hard drive containing the PC-ACE server installation directory (WINPCACE).
- Using Windows Explorer, locate the client installation program (CLIENT32.EXE) in the WINPCACE directory on the server. Execute this program directly from the remote drive (do not copy the CLIENT32.EXE to your local system).
- Follow the on-screen wizard steps to complete the client installation. You will be prompted to select a local destination drive. The PC-ACE program and client support files will install to the WINPCACE directory on the selected local drive.
NOTE: Once setup is complete, ASK will only be able to offer limited support as each networked multi-user operation could function differently.
-
What is the Short Cut to Help Topics within PC-Ace?
Select the F1 key when in any of the available buttons.
-
Are there any plans to develop a Macintosh version of PC-ACE?
There are no plans to develop a native MAC version of PC-ACE. However, we have heard a number of users are running PC-ACE on MACs using the Parallels emulation product. While we don't officially support this configuration, it might be a viable alternative for MAC users.
-
How do I check my version of PC-ACE?
From the PC-ACE toolbar, click on Help, click on About Inovalon Provider, Inc. There will be a number on the screen indicating the version you are currently running.
-
How will I know if I have the ASK version of the PC-ACE software or I have the Medicare version?
You can check this by clicking on Help from the PC-ACE toolbar, if you have the word ASK, it is our version.
- I tried to save a claim and received an Edit Validation List with flashing boxes in my claim screen? What do I do?
These flashing boxes indicate an error with the data entered in that specific box which needs to be corrected before saving the claim. If you click “Save” in any area of PC-ACE where you have entered information, it will either save the data (if data entered is correct), or the Edit Validation Errors List will appear listing all the errors currently in the claim. You can either double click on one of the errors on the list to bring you to the location of the error, or you can close the list and just look for the flashing boxes, indicating a correction needs to be made. Once data has been corrected the box may continue to flash until you click “Save” again to validate claim information.
NOTE: The red and purple flashing boxes signify different levels of system edits.
- Could I type in claim information manually or should I use the lookup files?
You may type all claim information directly into the claim form, but the Reference File Maintenance option can save time and increase accuracy. If you choose to setup the Patient tab in the Reference File Maintenance, you may then right click in the following boxes: Patient Control Number, Last Name, or First Name and the Patient Selection box listing all the patients that were built through the Reference File Maintenance will appear. You can then select the patient you need and all information for that patient will automatically populate the claim.
- How do I add a valid HCPCS, Diagnosis or Modifier code?
First, make sure you are using the most current version of PC-Ace.
If you are using the most current version, this may be done by going to the Reference Files and selecting the Codes/Misc Tab and then selecting the HCPCS, ICD or Modifiers button. Click on NEW, enter the code and description (the effective date range is not required), then click OK.
- How do I delete a line of service from a claim?
Go to the Billing Line Items tab of the claim, put your cursor at the beginning of the service line and then select F7.
- How do I copy a line of service on a claim?
Go to the Billing Line Items tab of the claim, put your cursor at the beginning of a new service line and then select F5 this will copy the service line directly above. You will need to enter the correct dates of service.
- How do I copy a specific field from a previous line?
Go to the Billing Line Items tab of the claim, put your cursor on the blank field just below the field you want to copy and then select F4.
- How do I get my claims ready to send to ASK?
To view the claims that you have completed and saved, click on the List Claims button on the Professional or Institutional Claims Menu. Claims with the status of “CLN” are clean and ready to be prepared for transmission.
- Prepare Claims – Select the Prepare Claims button on the Claims Menu. When the Claim Prepare for Transmission dialog box opens, select Prepare Claims. Click OK on the Confirm dialog box. You can select claims to prepare by LOB if the Reference File (SUBMITTER) section has been completed for specific LOB.
- Claims must be prepared before being sent to ASK. This necessary step generates a claim file that can be transmitted for processing. If this step is not completed, the last claim file that was prepared will be sent again. When claims are prepared, only clean (CLN) claims will be processed.
- Each time you click the Prepare Claims button it will overwrite the last batch of prepared claims.
- After completing the Prepare Claims function, an electronic file will be created and stored in the WINPCACE directory. The Professional claims file will be named BSTRANS.DAT and Institutional claims file will be named BCTRANS.DAT.
- To send files to ASK, please refer to Chapter 5 "EDIFECS HIPAA 5010 File Transfer and Downloading Acknowledgment Files" of the PC-Ace manual.
NOTE: After you have completed the “Prepare” step, the claims are moved from the “CL - to be transmitted” status to the “TR – transmitted only” status.
- Prepare Claims – Select the Prepare Claims button on the Claims Menu. When the Claim Prepare for Transmission dialog box opens, select Prepare Claims. Click OK on the Confirm dialog box. You can select claims to prepare by LOB if the Reference File (SUBMITTER) section has been completed for specific LOB.
-
Do I have to backup my files?
PC-ACE has the capability to do system backup and restores. In the event of a system “crash” a complete database restore operation can be performed from the most recent backup. However, if you have not been backing up the system it is possible that all information entered into the software could be lost. You will be prompted to perform a backup each time you exit the PC-ACE program. You can either click on the “Cancel” to skip the backup or you can select a Destination Drive or Folder for the placement of the backup data and then click on “Start Backup” to initiate the process.
-
When attempting to print claims to paper, I receive a warning: Feature Requires Adobe Reader be installed, what do I need to do?
You must have Adobe Acrobat Reader version 4.0 or later loaded on your computer. The Adobe Acrobat Reader is available for download from Adobe (http://www.adobe.com). Before downloading close the PCACE software. When the Acrobat Reader is (ACRORD32.EXE) properly installed, PC-ACE will automatically detect and configure this path.
If you have Adobe Acrobat Reader version 4.0 or later already loaded and you are still getting this message you can manually find the path by doing a Search for ACRORD32.EXE and write down the path found, Example: C:\Program Files\Adobe\Acrobat6.0\Reader\AcroRd32.exe. Go to the PC-ACE toolbar and click on file, then click on Preferences, then click the Misc tab—Click the box to the right of the Adobe Acrobat Reader field and follow the path found in the search (using the example: in the Look In field, click the down arrow and find the C: double click, then find the Program Files folder and double click, find the Adobe folder and double click, find the Acrobat folder and double click, find the Reader folder and double click, find the AcroRd32.exe file and double click this should put the correct path in the Adobe Acrobat Reader field in the PC-ACE, click OK on the Preferences window.
The Adobe Acrobat Reader Version loaded on your computer must match the version listed in PC-ACE.
This information can also be found by going to Help on the PC-ACE toolbar, Help Topics, Index and then type Adobe in the search phrase window.
- After sending a claims file, is there a way to send claims again without having to retype them?
Yes, there is a way to avoid re-keying claims, please refer to Chapter 8e of the PC-Ace Manual. Click on the Professional claims icon or the Institutional claims icon and click on the “List Claims” option. This will open up the Claims List. Toward the bottom of the screen, there will be a “Location” box with a drop-down arrow. Change the location to “TR – transmitted only”. A list of all claims should be present.
To Reactivate the claims individually, put a check mark next to the claims that need to be resent. To Reactivate the entire transmission, go to Filter on the toolbar, click on Check All Claims From Selected Transmission. Then highlight the desired transmission file and click on Select.
Next, click on the “Actions” option listed on the menu bar. Choose “Reactivate all Checked Claims”. A confirmation box should appear asking if you are ready to reactivate all checked claims. Click OK.
This will move the claims from the “TR—Transmitted Only” location to the “CL—to be transmitted” location. The next step is to change the status from the “UNP” to “CLN”, which can be done by opening each claim, making any necessary changes and/or correction and then clicking “SAVE”. The claim file is then ready to be prepared and sent.
-
Can I resend an entire batch of claims?
If there are NO corrections to be made to ANY of the claims contained within the file you can resend an entire batch by clicking on the Professional claims icon or the Institutional claims icon on the toolbar. From the Claims Menu toolbar select Maintain and click on Transmission Log. Find the transmission needing to be resent and highlight the line, select Reactivate and Ok. This step will reactivate and prepare the claims to be resent. You are now ready to transmit your file.
- Can I copy a claim in PC-ACE?
Yes, a copy feature is present on the List Claims screen.
Select the claim you want to copy and press the Copy button at the bottom of the screen. A copy of this claim will appear on your screen. Change any information you need to and Save. This will create a new claim in the CL – to be transmitted location and leave the old claim in the TR – transmitted only location.
-
Will someone come to my office and train me on using PC-ACE software?
ASK does not provide on-site support for electronic submitters. The PC-ACE software is very user-friendly and we are able to easily provide support over the phone. The PC-Ace Manual is available to assist you in learning the software.
-
Can I transfer my patient and provider files into my PC-ACE software from another billing program?
This feature is not available. All provider and patient information will have to be entered into the Reference File Maintenance.
-
How do I change the Claims List Preferences?
From the PC-ACE toolbar, select File, select Preferences. Click on the Claim List tab, select Institutional or Professional. Click on the tab for the Claims View you want to change. In the Available Field List, highlight your selection and click the Arrow Key to move the highlighted selection to the Selected Fields column.
If you would like to change the order of the Selected Fields column, highlight the field name and click the arrow keys to move the field name up or down to the desired location in the list. Click OK to save the changes.
-
How will I know when updates are available to the PC-ACE software?
Sign up for the PC-ACE News E-mail list on our website. Complete this form with your information and then select PC-ACE News. Once you are signed up, any updates or news regarding the software will be sent to you via email.
If you do not have email/internet access it is your responsibility to check with ASK periodically (once per quarter) for updates.
NOTE: If you have questions or concerns about the software, please use the On-line Help feature shown in the example below.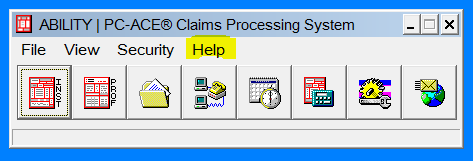
If you need further assistance, contact the EMS Help Desk at 800-472-6481, option 1 and option 2, or via e-mail at [email protected].
Updated 11/30/2023